Quantcast
Channel: Mr Collins Mathematics Blog
Viewing all 123 articles
Browse latest View live

Packaging Pringles...(other snacks are available)

$
0
0
This past week or so my Year 7 class have been looking at 3D shapes, nets, and constructions of shapes.
In order to give them a challenge/purpose for looking at 3D shapes etc I decided to set them a task of creating the packaging for a mini set of Pringles crisps. I set them the context that the manager of Pringles wanted to create a 'lunchbox' sized pack of Pringles and that he was looking for designs for the package of this box.
I got the idea from this resource uploaded on the TES.

Like the resource suggests the packaging must have been made using a single piece of A4 paper - to ensure the package is small enough to fit in lunchboxes and also saves on production costs etc.
I started the lesson by using my 3D shapes '4 words 1 pic' resource that I blogged about here. Then, having tweaked the above packaging resource slightly, gave the class a matching activity of some common 3D shapes and their relative nets to give them some ideas of what sort of packages they could create.

I naturally got some Pringles out then to model the sort of thing they needed to create and told them the basic measurements of a single Pringle, and then a stack of 5 Pringles for the 'mini-packet' they were creating.
The class were then given free reign of the type of packaging they wanted to create. I did however keep a list of success criteria on the board with the all things I wanted to see from their packaging (very much like the list in the resource but tweaked to include the number of edges, vertices and faces of their package).

As the students were working I went round the room checking the accuracy of their net designs and reminded them of the size of the Pringles they needed to package/house. I was impressed by how many students decided to create challenging packages - some were attempting cylinders, pentagonal prisms, trapezoids etc. There were a good amount of students that were doing cuboids too (differentiation by outcome here).

When the class got to the point where they were ready to build their 3D shape from their (checked) net I discussed with the class the need for tabs and how they would then stick their package together. I then gave them a Pringle each to use to ensure their 3D package could fit the crisp!

Here are some of the class' finished packages (some Pringles included!). As you can see I was mainly focusing on the class having a go at create a net and then creating their 3D shape - I wasn't too concerned with them actually designing the packaging, colouring it in, putting the logo on them etc etc.

A nice attempt at a triangular prism here


A cuboid, complete with an 'openable' lid


 The student who decided to attempt the pentagonal prism. There were slight problems with this one when they cut the net out as the widths of the rectangular faces were not the same as the lengths of each side of the pentagon. I had a discussion with the student about this and he then 'trimmed' the pentagon as best he could to make it work.
 Another cuboid example


 A cuboid with Mr Pringles on it! This student finished a bit earlier than others and so was able to start putting his designs onto the package.
 The students were very excited about actually using the Pringles to help them build their packages, oh...and getting to then eat them was a bit of a bonus for them.


 An attempt at a trapezoid here, not as accurate as it could have been - again, issues here to do with the lengths of the sides of the faces when drawing the nets! Something I can go over with the class next lesson.
Here are all of the 3D shapes that were made in the lesson. Those that chose to attempt the cylinders were the least successful designs as the students lacked the knowledge in terms of the circumference of the circular faces and the relation to this and the length of the rectangular face. However, the fact they were accurately constructing the circles built on what we had done in previous lessons and they used the length of a Pringle to determine the diameter/radius of the circles they needed to draw.


 After these 2 lessons looking at 3D shapes and their packages for the Pringles we looked at creating more polyhedra by using my class set of Polydron. With the exception of the polyhedra that used the pentagons and hexagons (I didn't have these in my polydron set) I used this resource from the TES to get the students to discover Euler's relation between the edges (E), vertices (V) and faces (F) of the polyhedra they created.
I made good use of the website suggested in the description of the resource to print off the nets of the polyhedra mentioned on the w/sheet. This meant that students were either a) using the Polydron to create the shapes and identify the F, E, V b) making the polyhedra from the nets and then identifying the F, E, V or c) looking at the images on the w/sheet to work out the F, E, V for each.

1 of the students then managed to correctly identify Euler's relation between the F, E and V - I was extremely impressed here and lot of VIVOs (my school's rewards system) were given! At the end of the lesson, and for the plenary, I asked said student to tell the class what he had found, I wrote it on the board and then asked the rest of the class to see if it worked with the F, E and V they had identified themselves. Cue LOADS of 'oh yeah' moments from the rest of the class - this moment in class was one of those moments I have had when I feel the whole class have just 'clicked' or had that 'lightbulb' moment - great stuff!

An 'apeeling' lesson from @Maths_Master

$
0
0
Last week I saw a tweet from @Maths_Master (Will Emeny) linking to an 'apeeling' lesson on his 'greatmathsteachingideas' website. As soon as I saw it I was waiting for a reason to do this lesson with my Y10 class - I loved the idea!

It can be seen here... http://www.greatmathsteachingideas.com/2012/11/28/surface-area-of-spheres-an-apeeling-lesson/

Luckily, on Thursday, it was Pi Day. Naturally I started my lesson on Thursday by showing my class my Pi Day '4 pics 1 word' resource I had created especially for that day. My resource can be downloaded from the TES here. This lead to a discussion as to what Pi was and then gave me a natural link into looking at finding the area and circumference of circles and then looking at areas of sectors and lengths of arcs. Near to the end of the lesson I had given some of the students who were ready to move on some volume of cylinder questions to attempt. Having looked over the METHODS of Mathematics SoW for the Unit 2 topics I remembered that the volumes of cones, cylinders and spheres were near to the end of this and would be needed to be taught too. So, rather than waiting til the end of the SoW to cover this I decided to do this in our next lesson, building on our work involving Pi.

The start of our next lesson began with the class working out the volume of cylinders picking up from where we left off. I had a picture up at the start of the lesson too, to hint at what we would be doing for the bulk of the lesson, here was the pic I used (you've probably seen this before, I was reminded of it at our INSET session last Fri, which was delivered by @vicgoddard!)


Here's where @Maths_Master's brilliant lesson idea came into play. I went through the answers to the volume of cylinder questions and then referred the class to the formula sheets in their mock papers they had just completed. I highlighted on here the volume of a prism and then the formulae for the volume of a sphere and cone (I purposely, at this point, left out the curved surface area formulae out). I gave the class 3 questions of each to apply the formulae too and then checked, as they worked they were able to use their calculators correctly. After the answers were displayed and learning checked I got out the oranges I had rushed to Tesco to get the previous evening!

I then explained to the class what I wanted them to do in their pairs - and followed the details as per @Maths_Master's idea linked above. The class then, in pairs (after I had read the riot in terms of ensuring I wasn't going to find orange peel in all crevices in my room later that day) starting to draw around their orange and then peel their orange and sculpt the pieces into the circles they had created. This then proved the curved surface area of the sphere being 4 x Pi x r x r. Here's some of the class' work as they were doing it...

Students started by filling, as completely as they could, one of the drawn circles with the orange peel


 They then continued to fill in as many of the other circles that they could. They drew as many circles as they could on their pieces of paper.
 Eventually, students found that the orange peel fitted 4 of their circles. So 4 x the area of one of the circles = 4 x Pi x r x r. This works as the radius of the circles is (practically) the same as the radius of the sphere (orange).
One of my students managed to peel the orange in one go - this I found rather impressive!


The class then worked out the curved surface area of the spheres they were asked to work out the volumes for earlier in the lesson - this formed the plenary for our lesson.

Note to self...make sure you remember some kitchen towel next time to clear up the small amount of juice that will end up on the tables, oh...and for those kids that will complain that their hands are 'sticky'.

I'm still here. Will I be in another 3 years? #blogsync 3

$
0
0
This post is a response to the 3rd #blogsync topic of 'Wasted Investment? Why do so many teachers leave the profession in the first 5 years?'

To see all other posts on this topic go to http://share.edutronic.net/

I'm still here. Will I be in another 3 years?

I would love to answer this question with a whole hearted 100% YES! However, I have no idea what the next 3 years of my teaching career are going to present me with and as other posts on this topic have suggested, some teachers may have left the profession after their teacher training year and NQT year due to the sheer amount of work just not easing off. Sure, we all know it's hard work and that the first few years are tough, but then should we also expect things to get easier as we gain more experience and get used to the pressure and workload, perhaps this isn't going to be the case?!

What I do know is that this IS the profession for me, I love what I do and I'm constantly inspired by those I work with, the people I interact with on Twitter, and most importantly...my students. There's a number of reasons why I haven't left yet (and why I'm pretty sure I won't be leaving anytime soon)and I think these reasons lie in my background coming into teaching:

1) I failed Uni 1st time round.
2) I worked abroad.
3) I've had so many different jobs I can't remember them all.
4) I did 2 years as a Cover Supervisor.
5) I completed by degree part time whilst doing 3) and 4).

Back when I was at college it got to the point in my A2 year where everyone was starting to apply to University. I still didn't know then what I wanted to do, or even what I should do. So, inevitably I followed the crowd like the sheep that I had become - merely following a path that essentially was what I was told I should be doing given by GCSE grades and A-Level predictions. It was almost as if college and University were expected of me. So, I applied to Universities and chose a course (Information Mathematics BSc) that I had little idea about, but fitted with the subjects I was doing at University. No wonder, towards the end of the 2nd year I decided to leave. This was a pretty low point as I had no idea where I was going next.

So, naturally, I became a holiday representative for a '18-30' holiday company. I lived and worked abroad in Ayia Napa, Cyprus and then Kardamena, Kos, Greece in the 2 summers I held this post. The reason I mention this is that this job was relentless and the hours I worked this role are pretty similar to those that I currently work as a teacher. You were under pressure constantly to hit sales targets and got very little sleep in entertaining your customers and ensuring they had the best holiday of their lives. This, alone, stood me in good stead for what I was to experience in my GTP year and now in my NQT year. The lack of sleep I managed to get working as a holiday rep has definitely benefited me in the sense that, since 2007, my body clock has not adhered to normal social conventions; very rarely am I asleep before midnight and I hate mornings. In addition, being a holiday representative gave me confidence, resilience and the ability to stand in front of hundreds of teenagers and not be afraid to make a fool out of myself.

However, during my year in Kos I decided enough was enough and I needed a 'sensible' career. So, I returned home and looked into what it was I was going to do. I had always had in the back of my mind the desire to become a teacher, being inspired by my form tutor that I had at school (Mr Dearsley) and so this was really the only thing that I thought of doing. Now, what did I need to do this...oh yes, a degree (at least I did back then)! So, I started to do my degree around the '9-5' jobs I held over a 2 year period. Luckily, a family friend was the manageress of an employment agency and so I was able to get a good amount of temporary jobs falling back on my GCSE/A-Level results. These jobs were very limited in the amount of time they took up past the point where I left the offices at 5pm, nothing like what I currently experience. This worked for me. I was able to get home and do my course reading, essay writing, research and essentially get my degree completed. At no point was I thinking about the job I was doing at the time and these ranged from doing customer service work to doing statistical analysis for holiday companies.

I was still missing something though - I needed to get into teaching somehow! The chance came at the most inopportune of moments, I was at a birthday party and one of my old MFL teachers was there. Naturally we got talking about school, the fact I was doing my degree part time to eventually become a teacher, and then that proverbial door opened...I was invited to take part on the school's year 8 Germany trip. Following the trip I was then offered a job as a Cover Supervisor.

This is the reason I'm still a teacher today - the experience I gained and the enlightenment as to what it was actual like to teach in a school when I was working as a Cover Supervisor had me under no illusions as to how difficult the job would be. I saw the worst of the worst when I was covering lessons. Behaviour in some of those lessons was awful. I had days when I thought 'why on earth do I want to be a teacher'. I had days where nothing seemed to make sense in terms of what staff where being asked to do one minute and then what they were being asked to do the next. Nonetheless, I survived, and in some respects I thrived too. For every bad moment I was able to find at least another 2 good moments to counter-balance the negatives. This, I feel, is (for some teachers) what they are missing coming into the profession - reality. No romanticised version of what school and teaching is like, but a real idea of what goes on, how to deal with it and what to do when things don't go exactly as planned.

I'm glad things didn't go as was initially planned for me, I'm glad I didn't go School --> College --> University --> PGCE --> Teacher, I needed more than this. I've come into the profession at a later point in life than I perhaps would have, I have far more experience than the typical NQT has, and I truly believe that without it I wouldn't have the strength to deal with everything the job entails.

So now I'm here what could put me off?

1) The workload?
2) Expectations of the job?
3) Further responsibilities?
4) Behaviour?
5) OFSTED?
6) Other Staff?
7) *
8) *
9) *
10) *

*add as appropriate

As the above suggests, I can't think of 10 reasons - I've struggled to think of 6 and some of them are more as a consequence of the other posts I've read on this topic.

The workload could be a finishing factor. Like in a 'Mortal Combat' battle I could become so burnt out by the never decreasing workload that I'm stood dazed, weak and waiting for someone to respond to the 'FINISH HIM' cry.

The expectations on me as a teacher to do all those other duties beyond actually teaching my classes could cause me to end it all (my teaching career that is, not life itself); I'm talking mainly about all the meetings here I think?

Further responsibilities. This may be the most appropriate one for me personally I feel. I'm keen to improve and develop as a teacher, this inevitably will mean at some point I will want/look to take on more responsibility. Whether this be as a key stage coordinator or a 2nd in department, perhaps as an assistant head of house, an AST (or whatever they're being called now). I'm cautious about not diving into these positions too soon, for fear that the extra work will become the factor for wanting to leave. Being ready is essential. Am I ready - I'm not sure yet. Is it a reason some teachers leave the profession within the 1st 5 years? I'm sure it's at least someone's reason.

Behaviour. It could be that the deteriorating behaviour of students gets to me. But I do feel this is one for the more inexperienced. Those that perhaps were guarded away from the more difficult classes in their training year/NQT year. Those without the experience I had as a cover supervisor. NQTs are apparantly not to be given the most difficult classes to teach. I don't know how much this is true but I know I've got some tricky ones - has it affected me, no. Do I moan about having some of these classes and are they difficult to teach, oh yes!

OFSTED? They've been mentioned in the vast majority of posts in this month's #blogsync, and perhaps this is due to the fact that they are the pressure; the people for whom school's are 'performing'. I've experienced them come into my school when I was a cover supervisor and put the school in special measures. The effect they had on staff moral was shocking, the atmosphere they leave in the place when they're gone is edgy at best and there is definitely a fear of them. Personally, I don't believe that someone coming into one of your lessons for 20 minutes on one particular day in the school year can have any real judgement as to what goes on in your classroom throughout the whole of the year, or even since the last time they visited you and/or your school. The process, of course, needs to be there, but by no means would I get hung up on the fact that someone's opinion of one of my lessons may not be same as mine. In my opinion the only opinion that matters is that of the students I teach. Do they feel safe and respected? Do they enjoy our lessons? Are they learning? Am I doing the best I can for them? They (OFSTED) are not a reason to leave.

Other Staff. In a recent INSET session hosted by @vicgoddard, Vic spoke about radiators and drains. Radiators being those enthusiastic NQTs that are inspired by and inspire other teachers (I got a few dodgy looks from my table at this point). Drains are those people that seem to suck the life out of the place, moan about everything, sometimes just for the sake of moaning, and essentially bring everyone else down. I don't like these people, and have little time for them. I'm lucky to be in an office where everyone is a radiator. Sure we have moments where we are drains, but for the vast majority of the time we are discussing ways to improve, sharing ideas and generally enjoying our work. My advice to anyone starting teaching is to avoid the staffroom or the particular corner of the staffroom where these 'drains' reside - they'll suck you in and you won't like the person you become and neither will other people!

Who knows what the future has in store for me and my teaching career. As I suggested in the opening statement to this #blogsync I don't think I will be one of those teachers that leaves within the first 5 years of the profession. I'm here to stay.

So, there's only one thing left to say really, one resounding thought I've had in my head whilst writing the last few paragraphs...I'm still standing!

'Don't you know I'm still standing better than I ever did
Looking like a true survivor, feeling like a little kid
I'm still standing after all this time
Picking up the pieces of my life without you on my mind'


http://www.youtube.com/watch?v=bz7ifClpT4g

www.teacherled.com

$
0
0
Last year I found the following IWB resource... http://www.teacherled.com/resources/quiz/quizload.html and have put this to good use a number of times in my lessons as plenary activities to assess what my students have learnt. I'll either pair up students of similar abilities and ask them a question based on the lesson or I'll split the class into teams to answer questions.

I didn't, however, realise that this is just one IWB resource on a website FULL of IWB resources!

www.teacherled.com

I've just spent the past hour or so having a look at all the different resources on their and thought of how I might incorporate them into my classroom next term. Here's my favourites and how I intend to use them...

1) Keyword Jumble - http://www.teacherled.com/resources/keywords/keywordload.html

This IWB resource allows you to randomly generate a Mathematical word for students to unscramble. Very much like an anagram type starter activity and this is exactly how I intend to use it, either by choosing the randomly generated words, or (possibly more likely) to type in key words for the lesson one by one for the students to unscramble. The best thing about this is that as you type in the word(s) the letters are protected by *s so the students can't see the original word. The site then scrambles the word for you automatically generating your very own anagrams for students to solve. This will be great for literacy across the curriculum and for getting students to define each of the key words given to them. This would make a great starter activity for teaching a new topic or even for just settling students/giving them something to do as you come in.

2) Word Circle - http://www.teacherled.com/resources/wordcirc/wordcircload.html

This is a IWB resource very similar to the puzzles you find in the newspaper where you have a circle of letters that form a 9 letter word. The idea is, in the time given (3 mins built into the resource) to find as many 4+ letter words as you can from the letters given. I can see this being great for tutor time.

3) Letter Dice - http://www.teacherled.com/resources/letterdice/letterdiceload.html

Another great activity for form time this one...Letter Dice aka 'Boggle'. The resource allows you to roll the dice and then generate a 'Boggle' type board on your IWB. Students would then find as many words as they could in the time you give them. I could see this being used mainly in tutor time or even in a Mathematics lesson as a 'settler' activity, where students earn bonus points for finding a mathematical word!?

4) Algebra Substitution - http://www.teacherled.com/resources/algebraop/algebraopload.html

This IWB resource allows the teacher to go through some examples of substitution, choosing their own values to substitute in. The students can then complete the questions and then they can be checked automatically on the IWB. Good for checking understanding of BIDMAS (in some of the questions). This would be better though if the expressions to substitute into could be changed.

5) Prime Snakes - http://www.teacherled.com/resources/snakes/primesnakeload.html

This is the main reason I've spent over an hour checking out the resources on the site...it's ridiculously addictive, and quite hard too! The idea is you navigate the snake around the board trying to 'eat' all of the prime numbers. You'll need to use the arrow keys to guide your snake around the board. I intend to give this to my set 5 year 8 classes as they'll love it next time we're in the computer room, this way they can have their own game going, rather than having to take it in turns at the IWB (which is still plausible given that there's only around 10 of them in each class).

I'm sure there's loads of over IWB resources on this site I'll find a use for too, they've got isometric paper, clocks, 100 squares etc and some of the activities on there would suit Primary level Mathematics better than secondary, but are equally as valuable to those classes in secondary school that lack the basics.

To see ALL the IWB resources on this site check out http://www.teacherled.com/all-interactive-whiteboard-resources/

GCSE Revision Sessions - Passport to a [insert grade]!

$
0
0
I have recently been completing a series of documents for a new and exciting project the TES Maths Panel have been working on...watch this space for more information!

Whilst I have been doing this project, which has involved me searching through the resources on the TES I have come across a bloody brilliant idea... mrslack_maths' Passport to...

You can download the resource here.

I believe this resource would be great for revision sessions and this is exactly what I've been in the process of planning for next Tuesday with Y11. So, taking inspiration from Mr Slack Maths I have created my own version of the passport resource for the students I will be taking for the revision session. My revision session is to be aimed at those students that have either already gained a C Grade or are aiming for a B grade 1st time round. So, I have created a 'Passport to a B Grade +' resource, very much like Mr Slack Maths' that I will be giving to each of the students in my session.

Here's how the front/back cover look...


and here's how the centre of the passport looks...


I intend on printing the two pages front and back to make the passports.

As you can see, I have taken the B grade topics from the Edexcel 2MB01 Unit 3 spec. This is because some of the students will be sitting this paper and others will be sitting the Linear spec, both of which will cover these topics. There's only so much I'll be able to cover in the session and so I've opted for those topics that I feel students will be likely to come up against/will grasp fairly quickly. There will be some students that having scrapped a C grade earlier in the year will struggle with some of these topics, I'm thinking particularly the trigonometry/circle theorems questions.

What I have also done is put a QR Code next to each 'objective'. These link to my mrcollinsmaths YouTube Channel videos I have created today, specifically for the session. All of these videos can be viewed in one playlist entitled 'aiming for a B grade and beyond'. There are some that I haven't done yet and I'm in two minds as to whether I will, or whether, for those topics, I cover them in the revision session; I can see a few students potentially suggesting that the work has been done for them and so why be there at all - they'll take the passport, and my hard work, and do it at home!?
So, for some of the topics they'll need to be there for the session to be taught it. Of course, I'll be reinforcing and complimenting the videos too in the session - by no means do I believe the kids will watch the videos and therefore be 100% able to do those questions!

Like Mr Slack Maths suggests in his resource on the TES, I will be stamping the students' passports as they 'complete' certain 'objectives'. This will be by means of them completing some past paper questions that I will print off for them using the following website... http://www.bland.in/GCSE%20Maths/ (thanks to Will Emeny (@Maths_Master) for originally blogging/tweeting about this site)
This website groups past exam questions into a selection of topics and will provide the practice the students will need.

Remember my stamp from my http://mrcollinsreflectivejournal.blogspot.com blog last year? It's still going strong! (available from http://www.primaryteaching.co.uk/)
Each objective will be 'stamped' once students have successfully answered a sufficient amount of questions on the topic.

Rewards can then be given, either each time they get a stamp, or for the student/s that manage to get the most amount of stamps?!


I may run the session (2 hours in the morning, 2 hours in the afternoon) using the passport and get students to work through 'a page at a time'. So, they'd focus on the first page's 4 objectives first, pick one they need practise on or choose one to start with, watch the video or come to the front where I'll go through the topic and then they have the questions to answer. In this way I'll be able to focus on a few topics at a time rather than giving them free reign of any of the topics.

I will, of course, post a follow up to this post once I have done my session to let you know (those that are interested) of how it all went!

THANKS ONCE AGAIN TO 'mrslack_maths' FOR HIS EXCELLENT IDEA!

If you're running a revision session this week/in the near future it'd be great to find out what you've done in your sessions...let me know, comment below or tweet me @mrprcollins.

Data Handling Project...6 weeks of 'homework' for my Y9s

$
0
0
Before the Easter holidays we had a NQT session delivered by one of the school's ASTs. The session was on homework and ILTs (individual learning tasks).
During the session we discussed the differences between the two and considered how we might build these into our own teaching.
I decided that I have already used a combination of these tasks. Homework in its simplest sense being a worksheet for my students to complete, work from the lesson to finish off, or tasks set on Manga High etc. Then the ILTs I have set my students would involve my YouTube videos and getting students to watch these or do some sort of research into a topic prior to me teaching them.

An example we were shown was one where our History department had project based tasks put up on the school's VLE for students to complete at home. These projects lasted for a number of weeks and students were given guidance as to what they should be completing in each week.

The best thing I took from the session was this example and the fact that we should be giving more follow up and feedback to 'homework' or project-based work that we set for work outside of the classroom. The session leader asked us how much we refer back to the h/w we have set and provide students with relevant feedback. This was one area where I haven't really focused on too strongly and this may be because the h/w I have set has been more for consolidation purposes than anything else and if I see a student has performed badly I'd ask them to stay behind at the end of the lesson to go through the h/w with them. I do this with my Y7 class a lot where I give them these sheets, available on the TES. If they get less than 15/20 they know they have to wait behind so I can go over their mistakes and discuss any areas of weakness. But as to an in-class whole 'feedback' session it is something I could improve on.

So, what I have done is create a 'Data Handling Project' for my Y9 class, and I will use them as my 'guinea pigs' to see how the above process can benefit my teaching and their learning.

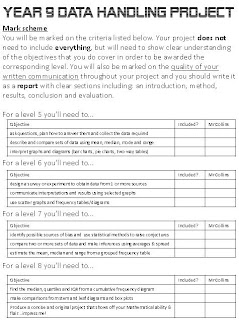
The project is one in which they will be given free choice as to what they choose to do the project on. I have set up a pdf doc for them to work through at home. The pdf includes an introduction to the task, which I'll go through with them the first week back (next week). A mark scheme for the project is provided so they know what I'm looking for and have some criteria to guide them. There is then a week-by-week guidance as to what they should be working on over the course of the 6 weeks. I choose a 6-week period as this is the length of the 1st half of our Summer term.

The key thing to this project that I want to build on is the feedback I give to the class and the constant loop of 'where have you got to' and 'what do you need to do next'. I see the class every Tuesday (the only day we have a lesson in both weeks of the timetable) and so I have set aside parts of these lessons to go over the students projects, check their progress and suggest ways forward. I will do this using both my input to the whole class, having taken examples from the class, and via peer assessment with the students getting the opportunity to look over each others projects. This, I can see, will be very important in the first feedback session after they have decided on a hypothesis and therefore project idea. Taking suggestions from the students and asking them what they plan to do etc should open up some good discussion points for the rest of the class to take on board and reflect on their own ideas.

Here are a few print screens of the pdf document I will be sending the class via e-mail...

 Front page to the project (word cloud created using www.tagxedo.com)

 The mark scheme page.
Week 2's guidance and expectations.


I have just uploaded the ppt I created the pdf from to my TES resources for others to use. This way you can edit the document to tailor it to your class' needs. The project can be used with other KS3 year groups, or even adapted for KS4.

Download my resource from the TES at http://www.tes.co.uk/teaching-resource/KS3-Data-Handling-Project-6327996/

I'll be writing follow-up posts once the class get started and working on their projects, I may even post some of their ideas and hypotheses. This way I'll be able to reflect on the process and refine it for future use. I'm planning on taking photos of my Y9s' work too so I can use it in the future with other classes to model what sorts of things are possible.

Any comments on this are more than welcome, especially if you've tried something similar in the past!?

GCSE Revision - 'Tip of the Iceberg'

$
0
0
Earlier in the year, late January, I observed a 'literacy exhibition lesson' that one of our school's English ASTs put on for teachers to attend if they were free and able to do so.

As literacy across the curriculum is a key push by our school this year there have a been a number of these lessons put on by our ASTs and I this is the 1st post of the lessons I have observed and will write about.
Another pull to observe this lesson is that the class that were being taught included a few of my Y11 class, some of which I had, at the time, only recently started to teach after our sets were changed due to recent examination results. So, I had the added bonus of seeing some of my students in another lesson, which I have found extremely useful in the past - how they act/react to a different teacher/subject etc.

The lesson itself was about the class revising for their English GCSE examinations and answering a GCSE question, focusing on structuring an answer and also on analytical skills.

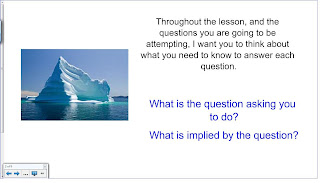
The lesson started with an image of an iceberg of the board. The teacher asked what they could see on the board. This lead to a discussion on the 'tip of the iceberg' and how this was the 'explicit' part of a GCSE question - what it's literally telling/asking you to do. The rest of the iceberg, and majority, was the implicit part of the GCSE question, what is being implied by the question and what is it you need to do/show that they're not actually telling you in order to answer the question.

For example if you saw a question involving an image of a triangle and the question said 'Find x' you would explicitly be asked to work out the missing value of the length of the triangle marked x. What could be implied is that you need to use Pythagoras' Theorem in order to do this.

The lesson then continued to look at some images and the teacher asked the class what was implied by the images. One of the images was of a red rose. The suggestions the class came back with were: danger, love, death, anger, fragility, pride (the English rugby team's logo), beauty etc. Lots of areas here for discussion with each that were explored as the teacher questioned why they had chosen their given suggestion. What was key to this activity is the teacher used a lot of encouraging language to entice the students; 'there are no wrong answers', 'you're not wrong', your opinion can never be wrong' were just some of the phrases that were used.
The teacher then asked how they explain what is beneath the surface and then referred the class to a flipchart which had a load of analytical vocabulary. The class would later be looking out for this vocab in a written answer to the question they would then be asked to answer themselves.

After this, the teacher showed the class an image of a burger and used it to symbolise the stages in structuring an essay answer. The bun was the 'point' they were making, the burger/filling would then be the 'quote' the students would use to back up their point and then the other bun was their 'comment' explaining their point. This was when the exam question ('how does John Agard use imagery in Flag to present attitudes to conflict') was showed on the IWB and the teacher, having given a copy out to each student, asked them to highlight the 3 parts of the example answer and then highlight any analytical language that was used within the answer. This was key to setting the class up to then write their own answer to the question, or (quite nicely) another question of their choosing from the same poem they were studying. There was a brief 'it's quiet work now' before the class then got on with writing their own answers to the question/their chosen question. After the class were given time to do this they were welcomed to read out their answers and students were asked to listen out for their analytical vocabulary.

Whilst the class were working, and throughout the lesson, I was thinking of how I can get the lesson into one of my Mathematics lessons, something that being a Mathematics teacher doesn't necessarily come naturally! I've always thought that getting literacy into a Mathematics lesson is as difficult as getting numeracy into an English lesson!

However, I related everything the teacher did to the Mathematics GCSE paper. Sometimes students fall short as they do not understand what the question is asking them to do. This is often the case where you see questions that just give an equation and say 'Solve'. That is the only information the student is given - to solve the equation. But how? How do they solve the equation, what do they need to do...this is what is implied by the question by what sort of equation they are given. This is what I wanted to look at with my Y11 class and so I thought about 'the tip of an iceberg'...

I decided that I would simply, like in the above observed lesson, start my lesson by showing the class an image that they are likely to see in a GCSE examination paper -  right-angled triangle. From this I started to think of all the things the class could be asked to do and same up with this double sided piece of A3 paper...(the possibilities are seemingly endless, but did my students know this?)

It took me a while to sit down and think of all the possible questions/topics that could involve a right-angled triangle, I was surprised by how many possibilities/variations there could be...just from a right-angled triangle!
'Front and back'!


Having planned all the different things I could cover with the class in the lesson I started to put together a notebook file using the topics I felt the class would need to revise. Here are the initial few slides I showed the class...

This was my 'starter' slide. The amount of things the class suggested in terms of what they may be asked to do (what was implied/suggested by the image) were fantastic. It was also a way of me asking certain questions to gauge what they may have already known about certain topics


I used the 'tip of the iceberg' image the teacher used in the lesson I observed to show some continuity across the school to those students we both teach. I used this opportunity to praise those students in the lesson for their answers in the literacy lesson.
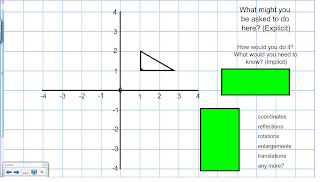
This is one of the slides I used to see if the class knew what they would be asked to do (explicitly stated in the exam question, i.e. rotate the shape 90 degrees about the point (1, 2)) Then, ask them what that implied they'd need to do? i.e. use their knowledge of coordinates and rotations - how do they rotate a shape?  etc
I then, after their suggestions as to what they may be asked to do, and then how they would do it, what they might need to use etc I revealed all the different things they could be asked to do with the image/question presented

I then gave the class some questions involving working out the perimeters/areas of triangles using Integers, decimals, fractions - these questions would test whether they would be able to multiply/add decimals and fractions - something that would be implied by the question just by the values they are given.

Finally, for the 'plenary' of the lesson, I showed the class this slide and gave them each a piece of A3 paper to fill in a 'mind map' style revision sheet based on the image I showed them right at the start of the lesson. They then would take this home and finish it off for 'homework'/their own revision.
 
I have added this, and a similar 'circles' tip of the iceberg resource to my TES resources for anybody to download (get them both, in the same resource, here) if they feel this may be something that would suit their classes. Both slides include loads of different topics/images to see what the class would glean from them.
 
I found this to be an excellent way of finding out what students might already know/not know on a given topic that was suggested from the original image shown at the start of the lesson. Then in the lesson itself, using the carefully planned activities, I was able to see if they knew lots of other facts/information by asking them to work with fractions, decimals, percentages (for higher students - surds) etc.
 
Hopefully, it also enabled my students to interpret the examination questions better too, looking for all the information in the question to help them understand what it may be that they are being asked to do - what the question is implying.
 
Let me know if you use the resource, if you make any amendments to it or have done something similar. Thanks to 'JB' for his lesson mentioned above, it provided me with the inspiration to create the resources for my own lessons, and hopefully has helped me build in literacy to my Mathematics lessons?!

#poundlandpedagogy

$
0
0
I have recently been reading lots of tweets with the hashtag #poundlandpedagogy. The phenomenon seems to have been started my @WallaceIsabella and there are loads of teachers out there now contributing to the discussion.

Isabella's original work on #poundlandpedagogy can be read in this article http://osiriseducational.co.uk/osirisblog/poundstore-pedagogy-inspiration-in-the-aisles

#poundlandpedagogy is where teachers use the items/objects cheaply available in stores like 'Poundland' and 'Pound World' etc in their classrooms to improve teaching and learning. Coming up with innovative ways to use the 'everyday' items you find in these stores.

There are already some brilliant ideas out there as to how teachers are using these items in their classrooms. Some fantastic examples are:

(@ASTsupportAAli) Bulmershe School Toolkit Blog - http://bulmershetoolkit.blogspot.co.uk/2013/03/cheap-shops-brilliant-lessons.html#!/2013/03/cheap-shops-brilliant-lessons.html

Dave Cookson's (@seatonburnDCO) blog where he regularly updates what he is using in his classroom under  the 'Technique a Week' heading - http://seatonburndco.wordpress.com/technique-a-week/

& most recently (inspired by the above) Mandy Lawson's (@seatonburnALA) new blog where she outlines how she plans to use #poundlandpedagogy in her classroom after the Easter break - http://seatonburnala.blogspot.co.uk/#!/2013/03/inspired-by-poundland-pedagogy-chat-on.html

There are plenty of other teachers contributing to and sharing their #poundlandpedagogy and they can be found by following the #poundlandpedagogy (click on this link) on Twitter! Some of my favourites so far include @fimturner's haul, & @ldufty's store eggs and reusable keyboard keys!

So, having been inspired and excited by the prospect of getting some cheap products and thinking of ways I can use these in my classroom I ventured into town today...

I went to 'Pound World' as it was the 1st one I came by, in preparation I also looked at the 'Poundland' website to see what sorts of items I would be likely to come across. You can check out both of their sites at http://poundworld.net/ and http://www.poundland.co.uk/.

I was amazed at how many things there are in these shops that you can use. The whole time I was in the shop my mind was going mental trying to think of ways to incorporate each item into my lesson. I went down each and every aisle searching for bargains to use. I eventually dragged myself away from the store with the following items to get me started this half of term...

 'Memo Cube' aka 'Post-it' notes! I already use these a lot in my lessons using my 'Tweets Plenary'. I also get my form group to write their examples using our school's 'Word of the Week' on these. I have got some more ideas to use these involving a rope ladder, but I'll post on that another time!
 Next up...balls of string. Being a Mathematics teacher these naturally come into play when looking at circumferences of circles, investigating and discovering Pi and looking at length etc. I have also used these this year for a 'probability washing line' and most recently to try and keep my garden fence from falling over! I plan to use these in some sort of 'washing line' display and, again, will post on this in due course.

 A great find here - masking tape! I get regular e-mails from Pivotal Education's Ellie suggesting ideas for 'Active Maths' lessons. One of these suggestions was to create a 'magic square' grid on your classroom floor, give students the numbers to form the magic square and then get them to arrange themselves in the grid so that all the rows, columns and diagonals sum to the same number! This is what I'll do with this initially and I'll post when it's done!
Balloons! I love using these in lessons and used them in one of my termly assessments last year on my GTP. I put a little piece of paper in each of about 12 balloons, 4 lots of 3 differently coloured balloons (differentiated). In a certain coloured balloon would therefore be a 'clue/hint' for the lesson. The students were then encouraged to, if needed, come to the front and [very safely] pop the balloon they required to get that clue for the lesson. i haven't used this yet this year and so these will come in handy to revive this strategy I have used previously...blog post to follow!

Lastly, and my favourite, most awesome, find of the day goes to...6 hula hoops (each costing £1)! Now, I have been on the look out for these since I read Bruno Reddy's (@MrReddymaths) blog post on using hula hoops to help his students revise the circle theorems. This is exactly what I intend to do with these and my Y10 class. I will, perhaps, use the string here too. There will be an epic blog post to follow this lesson, when it is done - watch this space!
 
As you can tell from the above, I intend to write an individual post, including pics, of how I have incorporated each of my purchases into my lessons and what effect they had on the learning of my students. I will try to do one of these posts a week from now until the half-term week and then hopefully go shopping again over half-term (if not before) to hunt around for some more ideas. I'm already on the hunt for some eggs and recycled keyboards in order to try out @ldufty's idea!
 
More to come... follow the #poundlandpedagogy for more ideas that are already in action!

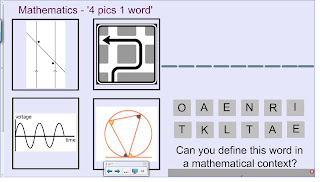
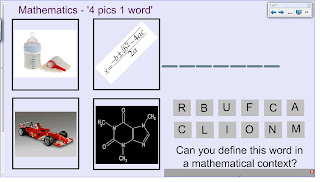
Mathematics 4 pics 1 word - Circle Theorems Starter

$
0
0
This is another of my Mathematics 4 pics 1 word resources I have recently created. both my classes and I are enjoying using these in our lessons and I've found them to be a great way to test students prior understanding of key terms for certain topics.

Next week, when returning to school from the Easter holidays, I will be revising circle theorems with my Y10 class before then looking at the circumference/area of circles and length of arcs/area of sectors.

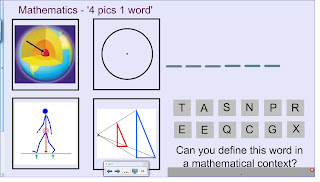
So, here's some examples of the new resource - I have included some of the previous 4 pics 1 word slides in the resource as they are also relevant here!


You can download this, and my other Mathematics 4 pics 1 word starter activities from my TES resources --> http://www.tes.co.uk/teaching-resource/Mathematics-4-pics-1-word-Circle-Theorems-6328376/

Thanks again to @srcav, @reflectivemaths & @El_Timbre for the inspiration behind these resources - oh and to the 4 pics 1 word app makers (app still available for download here)

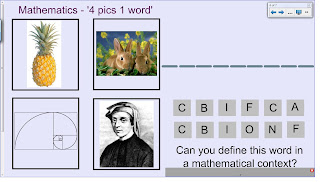
Mathematics 4 pics 1 word - 'Number' starter

$
0
0
Here's another Mathematics '4 pics 1 word' starter resource I have made. This time the resource is based around the 'Number' topics and in particular different types of numbers.

The resource can be downloaded from my TES resources at http://www.tes.co.uk/teaching-resource/Mathematics-4-pics-1-word-Number-6328541/ and include some of the following...

 An easy one to get started!
 One of my favourites so far!


Inspired by currently reading Will Emeny's (@Maths_Master) 'The Magic of Pineapples' available on the Amazon bookstore for Kindle here (it's only 77p)


I'm planning on doing an 'Introduction to Algebra' Mathematics '4 pics 1 word' next and will put details of this up when I'm done! Let me know if you can/can't guess what the words are above!

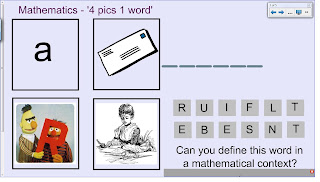
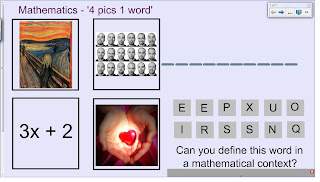
Mathematics 4 pics 1 word - 'Intro to Algebra'&'Polygons' starters

$
0
0
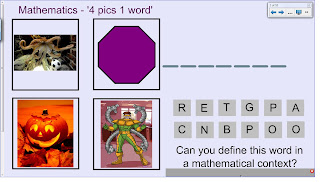
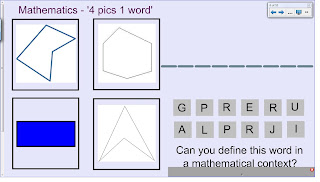
As promised in a previous Mathematics 4 pics 1 word post, I have now finished my 'Intro to Algebra' 4 pics 1 word starter resource and I've also done a 'Polygons' one ready for going over Interior/Exterior angles of polygons with my Y10s in the next few weeks!

Both of these resources are available on my TES resources at:

Intro to Algebra: http://www.tes.co.uk/teaching-resource/Mathematics-4-pics-1-word-Intro-to-Algebra-6328592/

Polygons: http://www.tes.co.uk/teaching-resource/Mathematics-4-pics-1-word-Polygons-6328726/

Here are a few examples of what's included in these 4 pics 1 word starters, first up - the Intro to Algebra one...

A nice easy one to get started, got to love the Bert & Ernie pic!
Any artists out there will get this one straight away?!
??


And here are a few examples from the 'Polygons' 4 pics 1 word starter (this one has 10 different slides in it)...

This one features 'Paul' the Octopus that predicted the World Cup results!
Bit trickier?
This will hopefully lead in to teaching about the int/ext angles of polygons!
Another one of my favourites, possibly too easy though?


You can download ALL of my Mathematics 4 pics 1 word resources on my TES resources or just by searching for 'Maths 4 pics 1 word', like this.
Alternatively, if you'd like to see all the 4 pics 1 words blog posts then click on the '4pics1word' label in the word cloud to the left of my blog page, like this.

Masking Tape & Magic Squares

$
0
0
Today was the 1st day back after the Easter Holidays and this gave me a chance to put into good use my purchases as part of my experimentation with #poundlandpedagogy. For more details on this see my previous post - http://goo.gl/aKNCh.

So, today with my Y8 set 5 class (one of them) I decided to use the 'masking tape' that I bought. I created a large 3 by 3 grid on the floor of the class underneath my IWB. Here's how it looked...


I started the lesson, as you can see by the image on my IWB, by getting the class to do a few things involving a 100 square. Namely, I got them to choose any 3 numbers of their choosing (>10) and add them up and then I asked them to pick a 2-digit number, reverse the digits, subtract the smaller from the larger number and then look at what the lowest possible answer was and why.
After this brief starter to bed them back into school life I drew a 3 by 3 grid on the board and asked them to experiment with it and try and create a 'Magic Square'. A square where all the rows, columns and diagonals sum to the same amount. I gave them free choice of what numbers to use and provided support (along with my 2 LSAs) whilst they were attempting this. The class found this quite challenging but none the less they were all able to access the task. Whilst the class did this they each had a go at our usual 'times tables challenge'. Using the IWB times tables 'game' I found off the TES they each had a minute to get as many correct answers as they could. I record these scores on a regular basis and the class love doing it and request it each lesson if I haven't mentioned it!

After the class had had a go at trying to create a 'Magic Square', and they had each completed their times tables challenge, I stopped them and prepared them for the next task.

I wrote the numbers 1 to 9 on the whiteboard and gave them each one of my number tiles from 1 to 9. I then told them that they would now try to create a 'Magic Square' using themselves and the tiles they had been given. They were to use the 3 by 3 grid I had mapped out on the class floor using the masking tape to do this. We spoke briefly about the significance of the numbers, the fact the number 5 would be a great choice for the 1st number to go in the 'middle' of the 'Magic Square' and then looked at the pairs of the remaining numbers.

The next part was over to them and I pretty much just stood back and let them get on with trying to move themselves, and each other to make the 9 numbers fit so that it created a 'Magic Square'. It was good at this point to see those students who took the lead and were telling others where to stand.

They didn't quite get to the full solution, they were close...but needed a bit more guidance, so we went through this on the table at the back of the class...


I'm lucky enough to have had exactly 9 students in my class to do this activity with. However, I can see it being run in class with different groups as a competition. Perhaps set up, using your masking tape, 3 different 3 by 3 grids around the room. Split the class into 3 teams and get them to see which team can get the solution the quickest?! I'm sure there will be more ways I can use the masking tape - any suggestions are more than welcome! #poundlandpedagogy


Similar Triangles

$
0
0
As I've hinted at in another recent post, I have been part of an exciting project the TES Maths Panel have been putting together - 'Topic Progressions'.

These documents have already been a great resource to me and my teaching and I have recently used the Shape - Similar Shapes 'Topic Progression' to find resources/questions for my teaching of this topic. One of the resources I therefore subsequently used from the TES was this resource --> http://www.tes.co.uk/resourcedetail.aspx?storyCode=6291667

If you click on the link in the resource it will bring up the 'Teach Maths' website (http://www.teachmaths-inthinking.co.uk/activities/similar-triangles.htm). On this page of the site it details an activity involving 24 similar triangles and is a lovely open ended task to give to students.

So, with the resource saved, the teacher notes read and the documents printed I was ready to go for my Y9 set 1 lesson on similarity of shapes. This would be the class' 1st lesson on the topic and as such I left the activity as open as possible to see what learning they may have had previously or thoughts they already had towards the task. As suggested on the site, I gave each group (my classes are all sat in groups now) a print out of the 24 triangles and got them to 'group'/'classify' the triangles as they saw best.
The interesting thing here is that, of the 5 groups of 6/7 students, 4 groups chose to classify the triangles by grouping them into 'equilateral', 'isosceles', 'right-angle' and 'scalene' triangles. There was one group that grouped them by size i.e. small triangles, middle sized triangles and large triangles. After this class discussion on how each group had classified the 24 triangles I asked them what they knew about similar shapes. One of my students then said that they were shapes where all the angles were the same. This then lead to us discussing that the similar shapes are enlargements of one another and that we can use the scale factor to work out missing lengths.

The class then had their task set - they were to find all 3 lengths of each triangle using their knowledge of similarity. They were not permitted the use of rulers or protractors but I hinted at placing triangles on top of one another to see if their angles were the same (and therefore they were similar triangles). I set the groups off on the task and this is how they started...

I gave each group one of my A1 sized magic whiteboard sheets to work on (these are available from www.magicwhiteboard.co.uk). They were given a good 10-15 minutes to attempt to find the missing lengths of the triangles with little input from me needed at this stage.
 Here's one of the groups attempt at beginning to sort out the triangles into similar triangles groupings

After about 10-15 minutes, when the groups were getting to the point where they were missing a few triangles' lengths, and they had done the perhaps, 'easier' ones I hinted that there were 8 groups of 3 similar triangles at this should help them work out which 3 triangles go together to work out the missing lengths.


At the end of the lesson I showed the class the correct lengths of all the 24 triangles and they marked their work as a group. The majority of groups got between 15-17 out of the 24 correct. One group got 22 correct. So, there's a little more work we need to do as a class on similarity and we'll be continuing with this next week.


I'd definitely recommend running this activity to others and I'll probably be using this with my Y10's too as Similarity and Congruence is a topic that comes up in both Unit 1 and 2 of the METHODS in Mathematics exam they are currently sitting - it'll be a chance for us to revise and reinforce our previous learning earlier in the year!

Circle Theorems & Hula Hoops!!

$
0
0
Inspired by @MrReddyMaths' guest blog post by @adrianjohnst on his blog my Y10 class have been creating Circle Theorems using Hula Hoops bought at 'Pound World' today!!

To see Adrian's blog post click http://mrreddy.com/blog/2012/12/guest-blog-circle-theorems-and-hula-hoops/

To visit the 'Pound World' website go to http://poundworld.net/. This lesson/blog post is part of my experimentation with #poundlandpedagogy.

This was our 1st lesson back after the Easter holidays and with a few personnel changes to the set due to recent mock results I felt it would be a good idea to revise over a few topics this week to get the class back into the swing of things and to provide links to the topics in the Unit 2 paper that we still need to cover. Another reason for looking at Circle Theorems again is because I didn't feel the class learnt enough when we covered them the first time round, the lesson, for whatever reason, didn't seem to sink in and so we needed to do more work here - the question/s that have come up in mock papers the class have done weren't fantastically well answered, as a whole group.

So, I started the lesson by using my Mathematics 4 pics 1 word Circle Theorems resource - see my previous blog post http://mrcollinsmaths.blogspot.co.uk/2013/04/mathematics-4-pics-1-word-circle.html (there's a link in this post to my resource on the TES available for download). I then, using the words in the starter activity went over the circle theorems on the board. I also had, on the tables prior to the class coming in, a sheet of QR Codes that linked to my Circle Theorem videos on my YouTube Channel (mrcollinsmaths). The idea then was for the class to use the videos and the notes I had written on the board to recreate one of the Circle Theorems. I asked groups to volunteer for a particular circle theorem at this point and this created a bit of competition with certain groups wanting to do certain Theorems over others. Once the groups had their circle theorems assigned I showed them (in the style of 'Blue Peter') one I had made early to model what it was I was expecting. Having thought about it now, I should have shown them Mr Reddy's blog post (darn hindsight)!

So, here's one I made earlier...

I used a few of my other purchases at 'Pound World' including the 'Memo Cube''post-its' (however these aren't sticky) and the masking tape to secure the rods.

The rods I got from our awesome D&T department. I luckily caught one of the NQT teachers in the car park and told him what I was planning to do - we then went to the D&T workshops and sliced up some wooden rods they had lying around so I could use these as the tangents, chords, radii, diameters etc! These were a great help and it pays to know all the departments in your school - you never know when you're going to need to call on them for help!

This 'model' then gave the class the basis of what I was looking for. After a short health and safety warning about splinters I gave the groups their hula hoop, wooden rods and sellotape/masking tape etc. At this point I had quite a few of our faculty in the room as I had invited them in if they were free to see what we were doing (and give me a hand). A few of them went and found us some extra sellotape as the masking tape wasn't great for holding the parts in place. Nonetheless, look what the class created...

 Angles drawn from the same point
 Angles drawn from the same chord
Angle in a semi-circle (angle at the circumference is half the angle at the centre)


 Cyclic Quadrilateral (opposite angles = 180 degrees)

Angle at the circumference is half the angle at the centre


After the class had been given 15-20 minutes to complete their circle theorem hula hoops I asked one representative from each group to explain to the rest of the class what circle theorem they had done, explain the relative parts of each etc. I then collected them all in and handed out to the class a set of circle theorem past paper questions from the 'bland.in' website. The class then used my YouTube video and all the Theorems (now on the floor of the wall at the front of the class) to answer the questions. I was particularly impressed at this point that some of the class had got our previous lessons notes out of their exercise books to refer to too!

Here's all of them at the front of the class & the QR Codes sheet and questions I gave the class...

 All of them, at the front as a reference - I just need to 'hang'/ put these up on one of the walls in the room for future use!
Here's the QR Code sheet I made the class. The centre QR Code links to the playlist on my YouTube Channel with all the explanations and some past paper question solutions. The 6 QR Codes round the centre one link to a specific theorem.


I (and I hope the class) really enjoyed this lesson. I feel they were much more secure with their knowledge of circle theorems at the end of the lesson having gone over the answers to the questions in the 'plenary'.
I know need some more Hula Hoops to do a session on Venn Diagrams (as suggested by a few of my Twitter followers following my #poundlandpedagogy tweets)!

'Mathematical Concept Wall', the cards keep coming in!

$
0
0
At the start of the year I blogged about my 'Mathematics Concept Wall' and since it has become one of my most viewed posts this year. You can see the blog post here.

I also posted some examples of the Concept Wall Cards my students had produced here and here.

Well, since these posts I have had a whole host of other cards handed into me by my students. Some were done as an extension task for a cover lesson when I was on one of my county's NQT sessions, others were just done by my students in their own time. So, here's some other examples to add to the already excellent collection I have up on my classroom wall...

 I love the randomness of this one. Oh, and the 'clickity clack! clickity clack!'


Not strictly mathematical this one, but then neither was the 'Optimus Prime' card in the previous post!


I will definitely do this 'display' in coming years, refreshing the topics to choose from etc. My students have responded really well to the idea and enjoy creating their cards.

April #blogsync - "Progress in my classroom? How it is made and how I know it."

$
0
0
This is a post in response to this month's #blogsync topic of "Progress in my classroom? How it is made and how I know it." To see all other posts in this month's #blogsync go to: http://blogsync.edutronic.net/

As this month's topic is all about progress in my classroom it has allowed me to reflect on what and how I have been doing with a number of my classes over the course of the year and to see whether indeed my classes are making progress.
As a lot of posts in this month's #blogsync have already pointed out there is not just progress to be had in a single lesson, but also over a longer, more sustained, period of time. It is the latter that I will talk about here as I feel for some (if not all) of my groups this is more important.

I will discuss 3 different ways in which I have seen progress with my classes, using 3 different methods of recording such progress. The first will be with my low-ability (bottom set) year 8 classes, the second will be with my year 9 top set and the third and final example will be from my year 10 set 2 class that are sitting the first of their GCSE Mathematics examination in June this year.

Year 8s (both set 5s on either side of the year) - Times Tables!
When I was given both of the set 5 year 8 classes to teach this year there was one thing that became apparent fairly early on - they were really weak with their times tables. This was mentioned in all of the students' reports at the end of year 7 by their class teacher and was evident in my 1st few lessons with both groups. So, in an attempt to make my students become better with these very important basics I decided to continually test them on their times tables and give them regular practice with them. How I do this is by getting them each, throughout our lessons, to complete the Interactive Times Tables 'game' that I found on the TES. The resource can be downloaded here. Now, I don't do this every lesson with the classes as too much of anything gets stale, but we do them at least once I week, on average, I would say. The students love doing them and often request to do them/ask if we will be doing them in lesson.
The advantage I have of having the bottom sets is that I only have 9 students in one set and 12 in the other. This means that the task does not interrupt our 'normal' lesson activities. I simply, whilst the class are working on the task given in that particular lesson, randomly call them up to the IWB to do the times tables 'game'. The game gives each student 1 minute to answer as many times tables (up to 12 x 12) as they can. Each question gives 6 possible answers to chose from, which for the set 5s is nicely differentiated. At the end of the minute I record their scores in my markbook and then call the next student up until all have had a go.
Then, crucial to the success of the task for this long a time, I give VIVOs (our schools rewards) to all those students that have improved their score by 3 or more, and then give the top 3 an extra VIVO each. This 'progress' is clear for all to see and I read out and congratulate those students that have made the 3 or more points progress from the previous go.

I have created a simple spreadsheet from all the lessons we did this in up to December 2012 and you can see a print screen of the results below...


I have highlighted 'student 4' above as this is the weakest student I teach in either of the 2 sets. This student didn't get a single times table correct in the minute given in his first ever go at it. Since then, the student is regularly getting over 10 a minute correct. Now, some might say that the familiarity with the task would naturally aid this, but for him it is a massive step forward. He has gained confidence with not only his times tables, but getting up in front of his peers and not being afraid to make mistakes, or be getting a lower score than others - and the rest of the class are surprisingly supportive of him and his quest to improve his score. I then created a graph of the class' average scores and you can see how this has improved since the start of the year. There are some dips here and there, and Mathematics is no straight line of progression from start to finish. Some of these 'dips' happen straight after school-holidays and this is a good excuse to remind the students of the need to keep practising them.

This, for my lower set year 8 classes is great progress. Especially as it was the one key thing they needed to improve on from year 7. They have all made progress over time, no matter how small and I'm starting to see now a greater ability for them to perform other tasks, and at a much higher speed than before. For example, when working out the area of rectangles they are able to relate this to the times tables 'game'.

Year 9 - Student Topic Trackers
In order for me to show progress in my Year 9 set 1 lessons I regularly have used my student topic trackers. I posted previously on the use of these here.

The topic trackers are a great way of showing 'progress' with the students' confidence from the start of the lesson to the end. On the topic trackers I split out all of the learning objectives for the series of lessons I will teach them on that topic. The lesson objectives progress in terms of their levels as you go down the sheet. For each objective there is then a 'before lesson', 'after lesson' and 'after revision' section for them to rate (on a scale of 1-4) their confidence with the lesson objective/s. This lesson based progress-o-meter is a good way of me seeing if the students have understood and feel more confident than they did at the start of the lesson.

Equally, from topic to topic, it is a good way of me seeing the progress they are making throughout the year. At the end of each topic I get the students to give themselves a level based on the topic trackers and the lesson objectives they feel most confident in and their respective levels. Then, from topic to topic I record, again in my markbook, the levels both the students give themselves and the levels I give them based on end of topic tests and h/w scores.

The topic trackers are then used for the students revision to go over those lesson objectives that they perhaps weren't so confident with. I can see these coming into play much nearer the end of the year when they will sit a GCSE linear paper prior to being setted for Year 10.

Here's an image of one of the topic trackers...


There have been a few suggestions from members of staff at my school as to how I could improve the use of these. The first would be to take their books in and do my 'teacher's comment' half-way through the topic, to make the feedback to them more useful perhaps as they go throughout the topic and be a bit more formative. The second is that they take quite a while to sit down and do the teacher's comments in the first place, so for every topic to cover in a year this could become too much. They do indeed take a lot of marking, is it worth it - yes, I think it is. Could the process be sped up somehow - I don't know yet. I have recently stopped using them with the class due to some topics we have covered being merely a 'refresher' lesson as the class would have covered it in previous year groups and so the topic tracker hardly felt relevant here. However, for those 'new' topics, or those that require a series of lessons to teach I will still continue to use them as I feel they are a good way of the students seeing the progress they are making - even if, as some would surely argue, it is only with their confidence and no concrete evidence of them actually making progress with the objectives. However, I would counter that by saying the 'after lesson' scale gets filled in in the 'plenary' part of our lessons having tested the students knowledge with an appropriate task. My teacher's comment and level are then based on the class work throughout the topic/objectives and their end of topic tests.

Year 10 - GCSE Mock Grades
In order to see if my Year 10s are making progress I have relied mainly on them completing GCSE mock papers and comparing the grades with their targets.
The class, to date, have done 2 official mock exams (Unit 1 [non-calc]) - 1 in January (straight after the holidays) and 1 at the end of February. They will sit one soon too by doing the Unit 2 paper (Calc), which will give me a further indication of their progress to date.
These results have given me a good idea of progress that has been made (if any) and the 'gap' still to close to their target grades.

Following the class' February mock, which was done in examination style conditions with the rest of the year group in the school hall, I showed them this notebook slide at the start of the lesson where I gave them their results back...

The 3 bar charts show (from left to right) the results from the January mock, the results from the February mock, and the class' target grades.


From the January mock the progress the class made was clear to see. We went from having 9 Ds, 18 Cs and 3 Bs to...6 Ds, 16 Cs and 8 Bs. There is still a notable jump to get the class to their target grades, but these are targets for the end of Y11! Still, I obviously want them to get their by June!

In that same lesson I gave out 'awards' for those students that had 'progressed' in some way from the January mock. The certificates/awards I gave out can be downloaded from my TES resources here. I gave those students that had progressed from getting a D grade to a C an award, those that went from a C to a B and those students that had continually showed progress in both the mock papers and all tests we had completed in class. There were plenty of students that received certificates in these lessons and this in itself showed me that the class have made progress (over the year).

I hope this blog post has been of use to others in how I have tried to show progress that my classes are making. I feel that learning Mathematics is definitely a 'marathon and not a sprint'. Sometimes students don't understand a concept or topic for years and then all of a sudden 'click' with it and get it. Sometimes we have to go back in our learning and make mistakes in order to progress.

Whether we, as teachers, are able to show that our students are making progress every 20 minutes of our lessons is something I'm not sure can actually be done. Can we show that progress is being made over time - Yes!

This is how progress has been made in (some of) my classes and I hope I have shown how I know it.

A Printing Epiphany!

$
0
0
Last week I was given information that has since made things so much easier! It is almost embarrassing to admit the fact that I didn't know about what I am going to talk about, but then when speaking to others in the department it seems I wasn't alone in my lack of knowledge!

I'll set the scene...

Have you ever needed to print from a pdf document or a word document and only wanted a particular page printed? You want this page printed 2 to a page side-by-side. Sometimes your pdf document or word document only contains 1 page, which in word is fine as you can just select all and create a duplicate 2nd page identical to the 1st to print these two pages on one page. However, if you have a pdf, which you can't edit - how do you get this 1 page printed as 2 pages side-by-side? If you already know the answer to this question, I envy you and your brilliance!

Until last week, I have been 'going around the houses' trying to get around this problem. One of my pet hates as a teacher is when student's books have paper hanging out the end of them. So, when I need to print off w/sheets for them I often print the pages 2 to a page and then guillotine them off so they can easily be stuck in without having to stick out the ends of their exercise books. This for pdfs and word docs that have more than 1 copy of the page you need is fine, or if you want to print 2 pages on the same sheet etc. However, when I've needed to print just that single page pdf document I've had to either print that 1 page on a full piece of A4 and then trim to size, or I've just printed that 1 page as a 'multiple' pages without anything next to it - it's then the size I want, but it doesn't save any paper and I end up saving the blank half for scrap paper to use in form time!

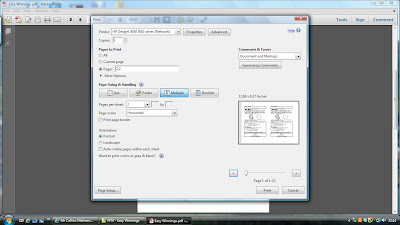
So, here comes the revelation...it is possible to print a single page pdf doc or even to pick a particular page in a pdf/word doc 2 to a page,and here's how...

Say you want to print this 2nd page from this 3 page pdf document. You want it 2 sheets to a single page. So the page is landscape and you have the same page printed side by side (2 of the same sheet on a single piece of paper)

All you need to do is this...In the 'Print' options box (pictured) you type into the 'Pages' box the page number and then a comma and then the same page number again! So, in my example, if I wanted to print page 2 side-by-side on the same piece of paper I would type '2, 2' in the 'Pages' box. I then print as 'multiple' like you would normally and you'll see from the 'print preview' picture how it then prints - just as I have always wanted!

Like I say, this to a lot of people will be nothing new, but for me (and I suspect others that didn't previously know this) it has blown my mind! It has saved me so much time already this week in terms of chopping everything up using the guillotine, or having to copy and paste word doc pages to create 2 of the same page to print etc.

Thanks go to Miss Jackson for this amazing piece of knowledge!

I am still wondering how on earth I have gone all this time without knowing this. Prior to teaching, I worked in a whole host of offices doing admin stuff, data analysis etc and regularly was needing to print. I'm now into my 4th year of working in a school and, again, have never come across this before! Crazy!

Maths Vegas! (Negative Numbers)

$
0
0
Today my students and I went to 'Maths Vegas'!

In a series of lessons we have had on looking at negative numbers, adding and subtracting them and multiplying/dividing with negatives etc I found this resource on the TES that I thought would work perfectly to see how much the class had learnt, and what we needed to do more work on!

At the start of the lesson, before we started the 'Maths Vegas' activity I got the class to do a little starter activity that @reflectivemaths had come up with after a conversation with @ASTsupportAAli - a spin on the traditional 'Noughts and Crosses' game.
Continuning my experimentation with #poundlandpedagogy the class were given a bunch of my coloured square pieces of paper (Memo Cube) that I got from 'Pound World' to work on and in pairs they played the game - to see more info on the game see @reflectivemath's blog post here.

I used the time the class were playing the 'Noughts and Crosses' game to set up a table on the board that would be used for the main activity - 'Maths Vegas'. I went round each group and gave them the equipment they'd need and asked each for a suitable team name for the lesson.
Each group then had a mini whiteboard, marker and a visual representation of £50 that they would use in the activity.

Each group had the following equipment to use in the lesson.

As I was going round the class getting team names and giving out equipment the 'buzz' about what was going to happen started to generate. I was putting team names on the board 1 by 1 and so the other groups were naturally drawn towards these and what other groups were calling themselves. I then added to one of the groups an extra £10 to use in the lesson before anything had started. This naturally drew a few questions as to why one group had all of a sudden got more money to use when we hadn't even started!

As I addressed the class to explain the activity I immediately had a hand-up...'Why have they got more money sir?' The answer was simple, that group were the only group to have chosen a Mathematically themed team name for their group... 'Rhombus'. At this point, and as I was giving the reason, brilliantly, a few of the class kinda of said (as I was saying it) 'because it's a mathematical name'. Clearly I'd awarded extra points for this in the past! :)

I then explained that the activity would work as follows:

Each team had £50 (or in the case of 'Rhombus'£60) to 'play' with throughout the lesson.
They would be given a question to which they had to place a 'stake' on. They could place a minimum of £1 and a maximum of £10 on each question.
If as a group they then answered the question correctly their stake got added to their amount, if they got the question wrong the 'stake' was taken off their amount. So, if starting with £50 and placing £10 on the 1st question they'd have £60 if correct and £40 if they got it wrong.
The class were given 30 seconds on each question, after seeing the topic of the question (see resource) to decide on their stake.
The class were given 1 minute to answer each question once revealed.
The class had to hold up their whiteboards, with the answers on, at the same time to avoid any group/s writing down the answers of others.

Before then starting the activity, and taking each group's 1st stake I asked each group to assign certain roles. They needed one person to be the person who writes the group's answer on the whiteboard, one person to assign the 'stake' for each round, one person to agree on the group's final answer and the rest of the group would help work out the answers in each 'round'.

As the activity started there was a good 'buzz' about the classroom, each group engaged in trying to answer the questions. The groups worked well with one another and the competitive element behind how much each group was 'staking' on each question and therefore how much each group could have at the end of each round was fantastic. At points, the class got too excitable and so I decided to take off money for those groups that I had to wait for for far too long. This stopped some low level disruption and allowed us to move on through the questions much quicker than we were initially.

At the end of the 8 'rounds' we managed to get through I put the groups final scores on the board. These were determined by the amount of money they had gained/lost throughout the lesson. Every team lost money, which from an ethical 'gambling' point was what I wanted. At this point I used this fact to emphasise the problems with placing 'bets' and 'stakes' etc and made it clear that it was not something that I was trying to encourage, but educating them on instead.
The group that then 'won' at 'Maths Vegas' was the group that lost the least amount of money - happily, this was the group dubbed 'Arsenal'! :)
I also then gave some VIVOs (rewards) to those teams that didn't pick up any fines throughout the lesson.

Here's how the table looked at the end of the lesson...

You'll see the 'Thoughts on Crosses' activity examples I gave on the left. The main 'Maths Vegas' table on the rest of the board.

I would highly recommend doing this activity and using the resource above. The resource covers adding and subtracting negatives, ordering negative numbers (and finding the median of them), multiplying with negatives, dividing with negatives, magic squares with negative numbers, negative coordinates and more!

Tessellations

$
0
0
Continuing my experimentation with #poundlandpedagogy I was looking for a more practical way of using my 'Memo Cube' than just using them as pieces of paper to write notes on. I'd used them in tutor time as scrap pieces of paper to jot down our word of the week examples on, or the numeracy puzzles we do, but wanted to find a 'better' use for them.


So, I decided to use them in a tessellations lesson with my Year 10 set 5 class, using a lesson that @kutrahmoore had previously done.

Before getting into the main activity (using the 'Memo Cube' notes) I introduced the topic of tessellations and referred to the class' previous learning on interior and exterior angles of polygons using this resource that I found on the TES. After briefly going over why the 3 main shapes (square, equilateral triangle and regular hexagon) tessellate I gave the class the w/sheet (slide 12) to complete. The questions on this sheet are very similar to those that come up in the examination papers and so I saw this as good practice for the class. I then advanced through the rest of the slides showing to the class how they can make their own tessellations and how MC Escher created his famous artworks. The class particularly liked how the tessellations were formed and then created and the prepared ppt that you can download above is very well presented to show these.

Then, I introduced the class to how they were going to create their own tessellations. This was where @kutrahmoore's activity came in.

The class were given a couple of the 'Memo Cube' notes and were asked to draw a line from the top of the note to the bottom. It could be any sort of line they liked, straight, 'zigzag', wobbly etc. Then they were asked to draw a line from the left hand side of the note to the right hand side in a similar fashion. This then split their piece of paper into 4 sections.
They then had to number the 4 original corners of the square (from left to right, top to bottom, 1, 2, 3 and 4).


They then had something that looked like...(here's the one I used to model the activity to the class)...

After the class had drawn the 2 lines, and numbered the corners 1-4 they were then asked to cut out their 4 sections. This can be seen in the bottom of the 3 images here.


These 4 sections needed to then be rearranged as per the slide shown below...


This then creates the shape the students then use for their tessellations. Once stuck together, front and back, it will look something like...

 All they needed to do next was to draw around their shape onto a piece of A3 paper and then keep going to create their tessellations.

Some of the work that was produced was fantastic! We didn't quite have enough time for the majority of students to fill their pieces of A3 paper and then colour them in appropriately to then put up on display. So, they'll continue with them next lesson.


Here's an idea of what they managed to create as the lesson progressed...


#poundlandpedagogy Eggs!

$
0
0
These have been on my 'wish list' ever since I read some tweets from other #poundlandpedagogy teachers on Twitter. I can specifically remember a tweet from @WallaceIsabella.

However, my recent trips to 'Pound World' (see http://poundworld.net) have been unsuccessful in finding these. So, in a desire to get some of these I searched on the web and found them just as cheap on Ebay and then on the following website http://www.littlecraftybugs.co.uk/index.asp.
They arrived this week!

I got 72 of them so I can use different sets for different classes...

After snipping the bit of plastic holding each half together, and filing the sharp bits off they are now ready to use in class tomorrow. Here's what I plan on doing with them...


As a starter for my bottom set year 10 class I have cut up sets of 4 different numbers and put these in each of 12 eggs (1 for each student + a few spare). At the start of the lesson I will get students to pick an egg from a box and then get them to do the following with their 4 numbers:

1) using any mathematical operation, and each of the numbers once only, make the number 24
2) arrange the numbers to make the largest number possible
3) arrange the 4 numbers in any way you like and then write that number in words
4) find the largest sum you can from adding 2 of the numbers to the other 2 numbers (this was a question that they got wrong in their recent foundation mock examination)

So, for the number in the picture on the left...

1) (8-4)x(4+2)
2) 8442
3) 4842 = four thousand eight hundred and forty two
4) 84 + 42 = 126 or 82 + 44 = 126


Then, for my second set year 10s, who have been doing trigonometry the past few lessons, they have a trig question each in their eggs where they will have to find a missing length of a right-angled triangle. After they have found their own missing length I will get them to peer assess with their partner to check their partners work and have theirs checked before we then go onto looking at finding a missing angle!

 Pick an egg...any egg
10 ticks trigonometry w/sheet cut up into individual questions (1 in each egg).
I'll also be putting the 4 numbers in the eggs too for them to try and make the number 24 as with the year 10 class above. I may also get them to multiply 2 2-digit numbers from their 4 too.


I'm looking forward to seeing the reaction of the students tomorrow when they are presented with these at the start of the lesson.

I have lots of other ideas as to how I can use these in class too which I'll post about as and when I use them in class!
Viewing all 123 articles
Browse latest View live